Courses
Courses hold your content and can have any number of students enrolled through any number of cohorts, with coaches to guide their path.
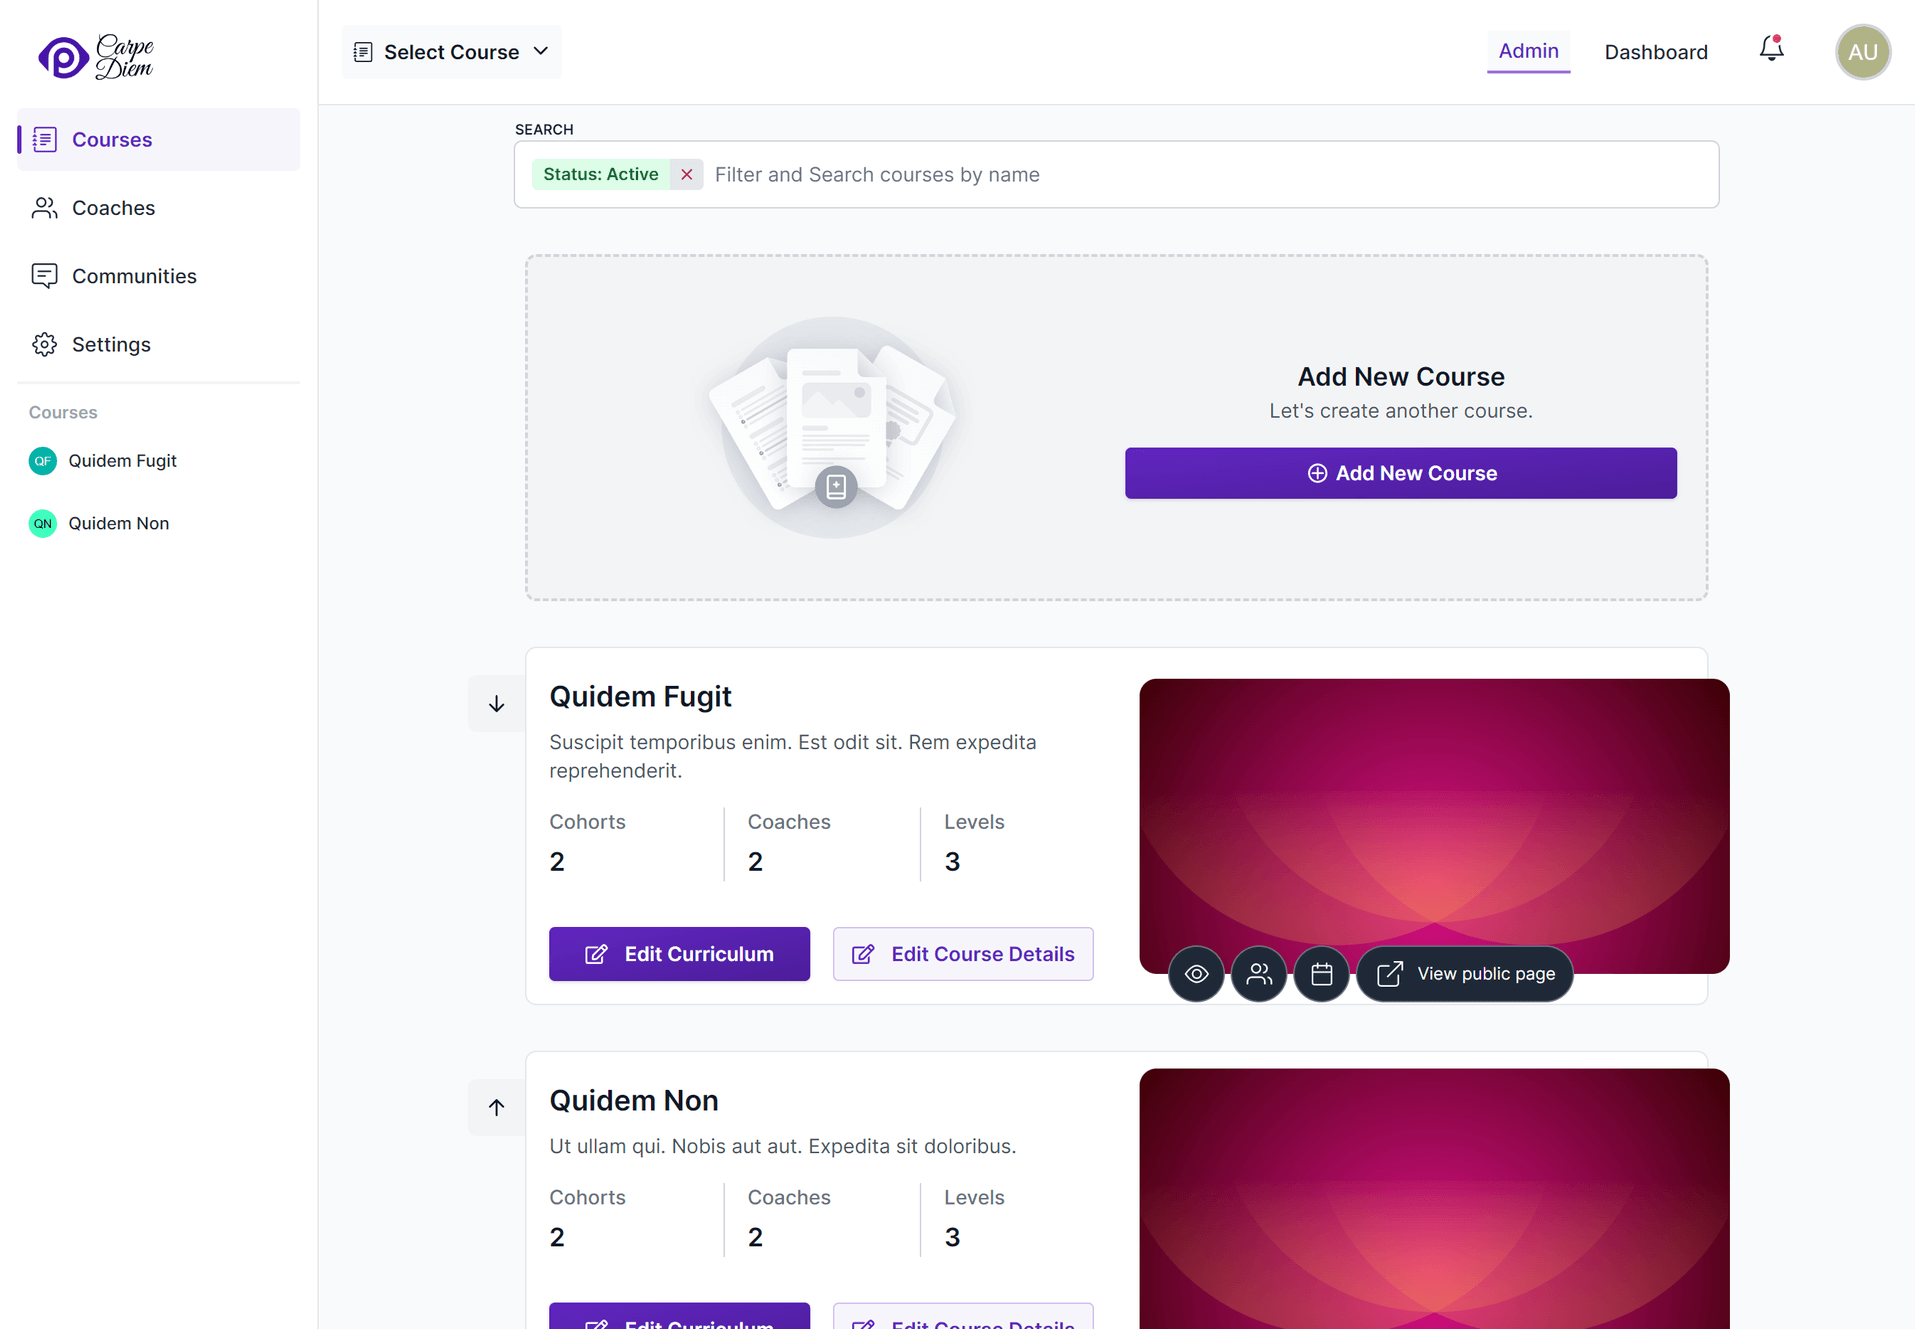
Creating courses
To create a new course, head to the Courses menu from the school administration interface's navigation bar, and click the Add New Course button on course creation card.
The form that pops up will ask you for a few details:
Course name: The name of the course, that will publicly displayed.
Course description: This short description will be displayed on the course's public page.
About: This is a markdown field - you can use this to add descriptive text about your course. This will be displayed on the course's public page.
Progression Behavior: This setting controls how students are allowed to progress in your course. This setting only applies if your course contains assignments that require your students to submit work for review. There are two possible options, which are described in detail below.
Feature course in school homepage?: If enabled, the course will be displayed on the list of featured courses on your school's homepage, along with a link to the course's details page (which includes the content of the about field).
Enable public signup for this course?: If enabled, members of the public will be able to sign up for your course.
Do you want to process applicant information before enrolling them?: If enabled, instead of being enrolled as students immediately, members of the public who attempt to sign up to your course will be redirected to a URL of your choice, and their information will be shown in the Applicants page.
Course Highlights: If set, a highlights section will be shown on the course's public page. You can use this session to highlight the core features of the course.
Allow public to view course curriculum?: If enabled, members of the public will be able to view the course curriculum without signing in. This will not let them interact with the course in any way.
Editing courses
To edit the details of a course, click on the Edit Course Details button located on the card displaying the course name and other information. The form used for editing the course is identical to the one you used during its creation.
Ordering courses
You can use the arrow buttons to the left of each listed course to change its ordering. This order will be used when listing courses in pages such as the school's homepage.
Default Cohort
A course's default cohort is the one to which all new students are added when they sign up using the public sign-up option.
You can create additional cohorts on cohorts page, and set any of those as the default cohort for a course by selecting a cohort from the Pick the default Cohort dropdown.
When a new course is created, a cohort named Purple (Auto-generated) is created and set as the default.
Editing the curriculum
To edit the contents of a course, you'll want to use the curriculum editor, which is documented separately.
Progression Behaviour
The way students progress in a course can be configured in two ways:
Limited (default): This setting allows students to submit work on reviewed assignments until the submissions queued for review reach a certain limit. The limit can be configured using the dropdown in the Limited option. The allowed values are one, two, three and four.
This is the recommended setting as it allows coaches some time to go through submissions while also not blocking students from working on the content further in the course. When student submissions pending review hit the configured limit, they'll need to wait until they get reviewed before they can submit more work.
Unlimited: This setting allows students to submit work on all the reviewed assignments that are reviewed by a coach without waiting for a review. This is useful if you want to allow students to work on the course at their own pace without any restrictions. However, this setting is not recommended for courses that have a large number of students, as it can be difficult for coaches to keep up with the submissions.
Course Images
You can customize how the course looks to the student by editing two images:
Thumbnail
This image will be displayed in the user's dashboard page, when listing the courses that the student has access to.
The image should have an aspect ratio of 2:1, with a suggested resolution of 768x384 (WxH).
Cover
This image will be displayed in all pages within a course. It's the large header image that appears at the top of every course page. It'll also be used as the header image in a few emails that are directly related to the course.
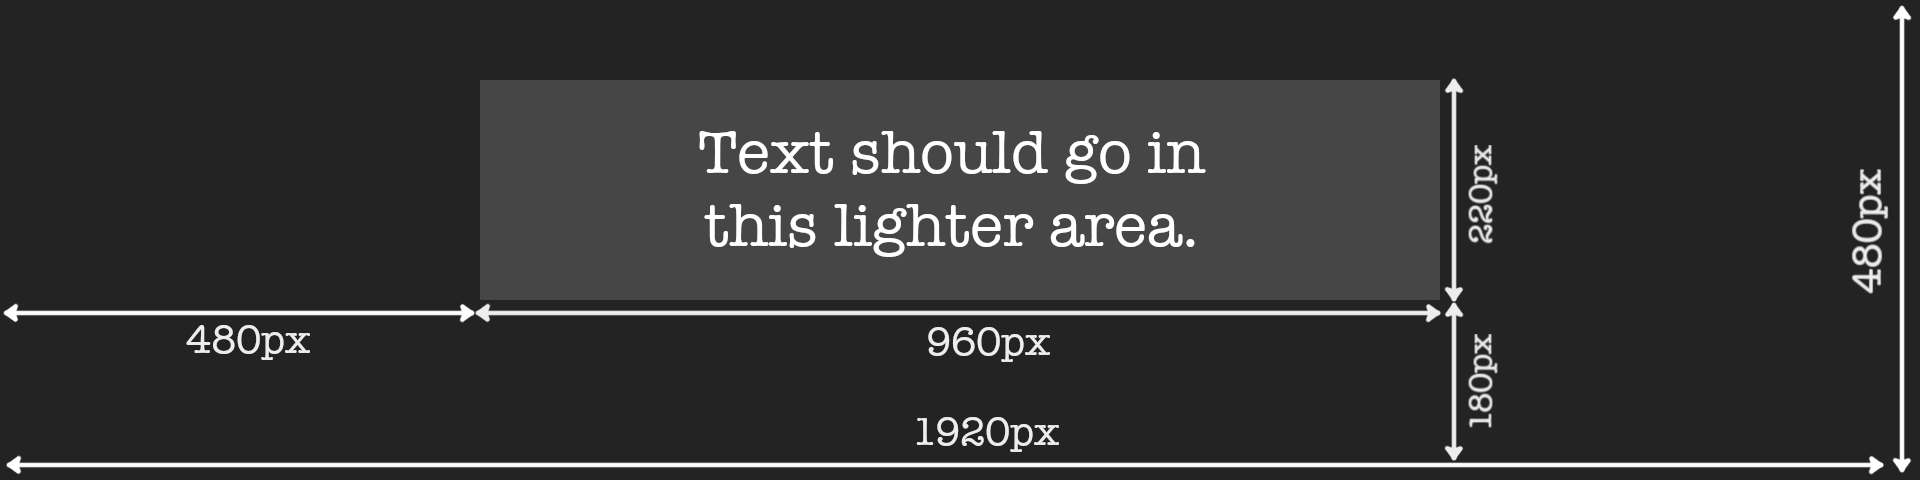
Because this image fits with the width of the page, it should be created following a few guidelines:
- The aspect ratio of the image should be 4:1. The suggested resolution is
1920x480(WxH). - Text within the cover image should be restricted to the center portion of the image. This is because the image width will be considerably smaller on mobile screens, and its height is restricted on larger screens.
- We suggest using an image with a dark background for improved contrast with the site's header and the rest of the page's content.
Here's an example image that shows where you should place text in a cover image:
Course Actions
Clone Course
This feature allows you to create a duplicate of a course, as the name suggests. It is extremely valuable when you want to build a new course using an existing course as a foundation.
Archive Course
Archiving a course will hide the course from the platform. All the students will be marked as access ended and they will no longer be able to access the course.
Unarchive Course
Unarchiving a course will bring back the course to an ended state. You can move it to live state by clearing the Course end date.
When unarchiving a course, all students attached to the course will continue to be in the access ended state.
States for a course
A course will always be in one of the 3 states mentioned below. You can see the courses in each state, by changing the filter.
Active
A course that is not ended or archived.
Ended
Courses with no active cohorts are considered as ended. Such courses will be hidden from all the navigation menus in the school administration interface. The links to school administration pages for the course can only be accessed from the courses page.
Archived
In addition to being hidden, such courses cannot be accessed or modified.